Creating custom traits
This tutorial takes you through the process of creating a custom trait.
A trait is an attribute or property of a visitor or visit, such as age or gender, that you can use to personalize content.
We create a trait that detects the visitor’s operating system. Depending
on the detected user agent, we serve the visitor a page with a
personalized
component. We create two component variants named WINDOWS and
OS-X for a component with a text and an image.
The trait extracts the operating system from the user agent in the HTTP header:
-
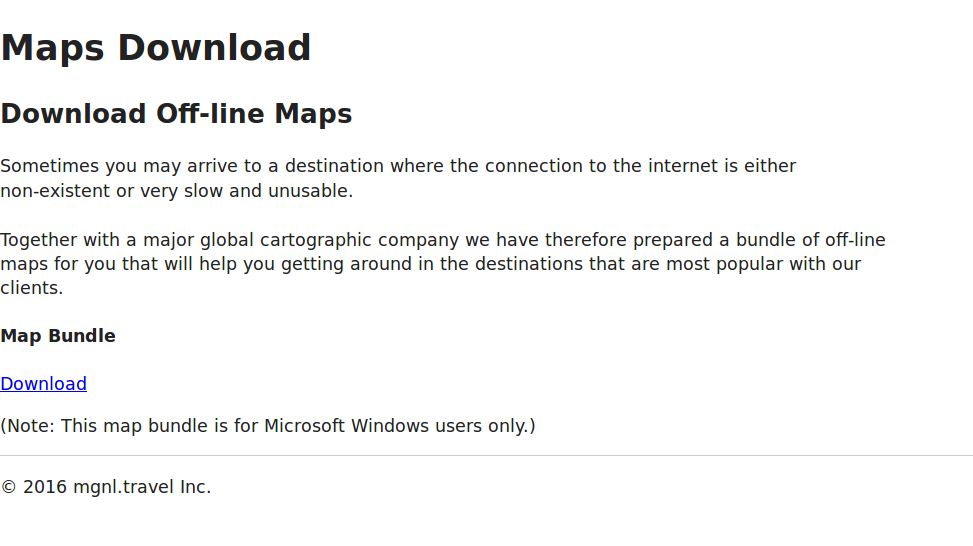
Windows users are served a component with text that refers to the Windows system and a download link (ftp://mgnl.travel/maps-offline/windows.zip).
-
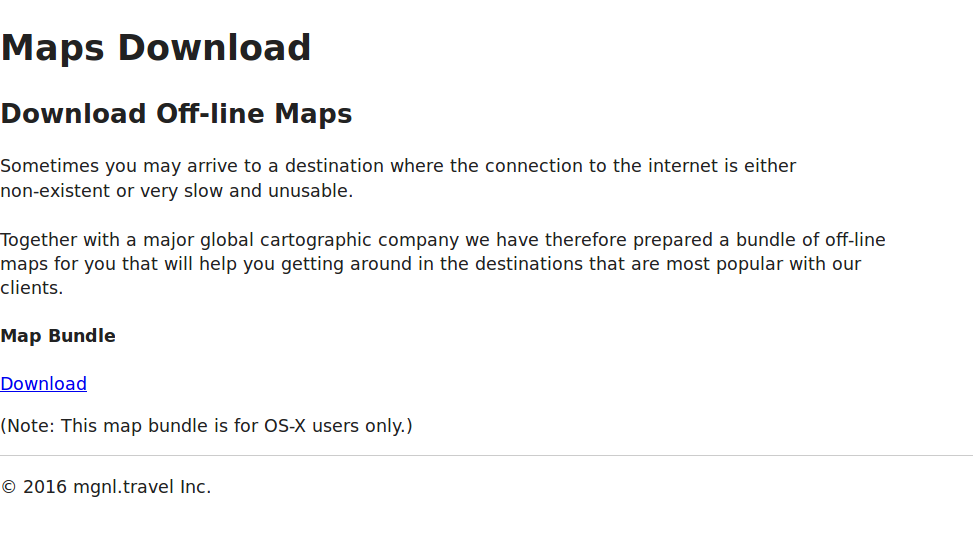
OS-X users are served a component with text that refers to the OS-X system and a download link (ftp://mgnl.travel/maps-offline/osx.zip).
-
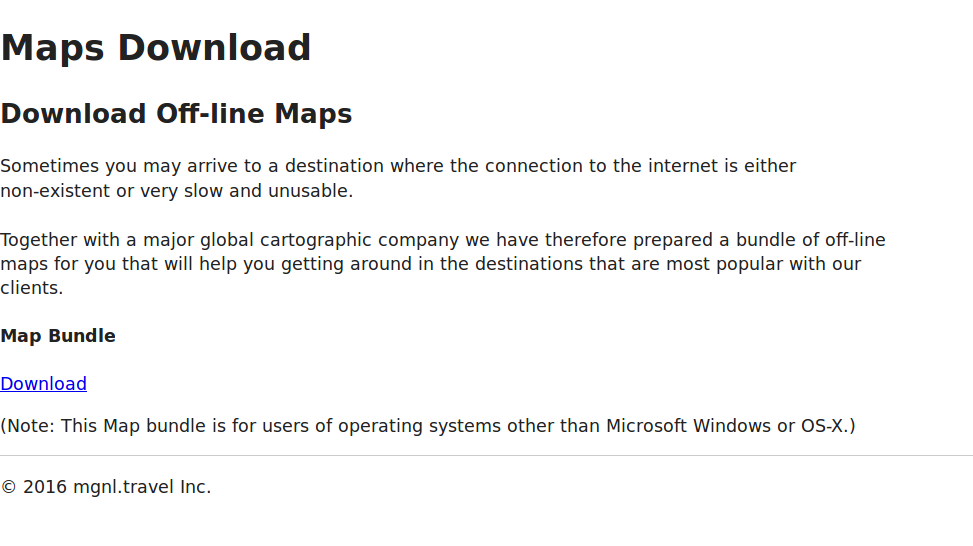
If neither system is detected, Magnolia serves the original version of the component, containing generic text and a download link (ftp://mgnl.travel/maps-offline/other-systems.zip).

Create a module
A trait is deployed with a Magnolia module. Create a module first. Choose from these options depending on your skill level:
Option 1: Clone the project in Git
This option gives you a ready-made project that you can customize to your needs.
Choose this option if you know how to work with a Magnolia project and Git, and want to examine the code locally in your IDE.
-
Clone the
documentation-trait-tutorialrepository.git clone http://git.magnolia-cms.com/git/documentation/documentation-trait-tutorial.git -
Import the project into your IDE. Here’s what the project structure looks like:
documentation-trait-tutorial ├── Jenkinsfile ├── pom.xml └── src └── main ├── java │ └── info │ └── magnolia │ └── documentation │ └── examples │ └── personalization │ ├── setup │ │ └── PersonalizationExamplesModuleVersionHandler.java │ └── useragent │ ├── UserAgentDetectorFilter.java │ ├── UserAgent.java │ ├── UserAgentParameterConverter.java │ └── UserAgentVoter.java └── resources ├── documentation-trait-tutorial │ ├── i18n │ │ └── module-personalization-examples-messages_en.properties │ └── traits │ └── userAgent.yaml ├── META-INF │ └── magnolia │ └── documentation-personalization-examples.xml └── mgnl-bootstrap └── documentation-trait-tutorial ├── config │ └── config.server.filters.userAgent.xml └── website └── website.maps-download.xml -
Build the project into a JAR and deploy it to your Magnolia instance, or run the project in your IDE. To run it in an IDE, add the module as a dependency to your Magnolia bundle POM file (see the next section).
Option 2: Add the project as a dependency to your bundle
Choose this option if you run Magnolia in your IDE, but don’t plan to work on the code.
Add the project as a dependency in the POM files of your Magnolia bundle.
For DX Core bundles:
-
In the
dependencyManagementsection of the DX Core bundle parent POM file, add adependencyelement with a version number: -
In the
dependenciessection of the dx-core-webapp POM file, add adependencyelement without a version number:If you use IBM WebSphere, add the dependencyelement in the appropriate POM file of your webapp of choice.
If you are using a custom bundle, add the dependency element with a
version number in the POM file of your customized bundle.
Option 3: Download the module JAR
Choose this option if you are new to Magnolia and don’t have a development environment (IDE). You can use the trait but won’t be able to look at the code.
-
Install the Magnolia Tomcat bundle.
-
Download documentation-trait-tutorial jar file from Nexus.
-
Copy the JAR into
<CATALINA_HOME>/webapps/<contextPath>/WEB-INF/libfolder. Typically this is<CATALINA_HOME>/webapps/magnoliaAuthor/WEB-INF/lib. -
Restart your Magnolia instance and run the Web update. This will install the
documentation-trait-tutorialmodule.
Registering a trait
Any module can register a trait. Magnolia observes the traits folder
in your module configuration and adds new traits to a trait registry.
Registered traits are then displayed to editors in the user interface.
- Properties
| Property | Description | ||
|---|---|---|---|
|
required Trait name. Choose a name that is easy for editors to understand such as
|
||
|
optional Name of the factory that instantiates a new trait. For preview purposes only.
|
||
|
required Field used to define permitted values for the trait. See Rule field below. |
||
|
required Field used to enter a single value to test personalized content delivery. See Value field below. |
||
|
required Converter class which must implement
|
||
|
required Trait class. Doesn’t have to explicitly implement an interface. Usually, it is just a plain Java object which allows you to specify the trait and its characteristics. |
||
|
required Voter class which must extend |
||
|
optional, default is Adds the trait to the Preview app. Set this property to |
||
|
optional, default is
If the trait is expected to remain the same for all requests in the
current session, you can set the value to
|
Rule field
A rule field defines values for the trait when you choose an audience. For example, you need two rule fields to define a date range: one for the start date and another for the end date. Magnolia uses the input entered into the rule field(s) to construct a voter. The voter then decides whether the visitor or visit matches the rule or not. When the rule is met, personalized content is delivered.
The rule field is displayed to users in the Choose audience dialog.
Choose a field definition class that lets the user specify the permitted values. In some cases, a simple text field is enough (country). In others, for example, where you need the user to select a value (new visitor, registered visitor, logged-in visitor), a select field is appropriate. For more complex fields, use a composite field. See List of fields for more.
userAgent rule field:
userAgent:
  ruleField:
    class: info.magnolia.ui.form.field.definition.TextFieldDefinition
    transformerClass: info.magnolia.personalization.ui.SimpleTraitValueTransformer
    type: String
| Property | Description |
|---|---|
|
required Rule field node. |
|
required Field
definition class. The field must be known to the system. If you
introduce a new field and only want it available in your module,
configure it in the |
|
required Transformer class which must implement
|
|
required/optional Field type. In this case, it is a bean property of the superclass
( |
Value field
A value field is for previewing variants. The field is displayed to users in the Preview app when viewing the page as a visitor.
When you enter a value that matches the rule, for example, Macintosh
in the image above, the voter tests the value against the rule and
Magnolia displays the content variant associated with the value.
The userAgent configuration is available at http://localhost:8080/magnoliaAuthor/.magnolia/admincentral#app:resources:view;/documentation-trait-tutorial/traits/userAgent.yaml:edit.
| Property | Description | ||
|---|---|---|---|
|
required Value field node. Field definition. See Rule field (above) and Custom fields if you need to create a new field.
|
||
|
required Must be the same as the |
Registering a trait detector filter
Once you have registered the trait, provide a
TraitDetectorFilter and register it in the filter chain to make sure
the appropriate variant is served.
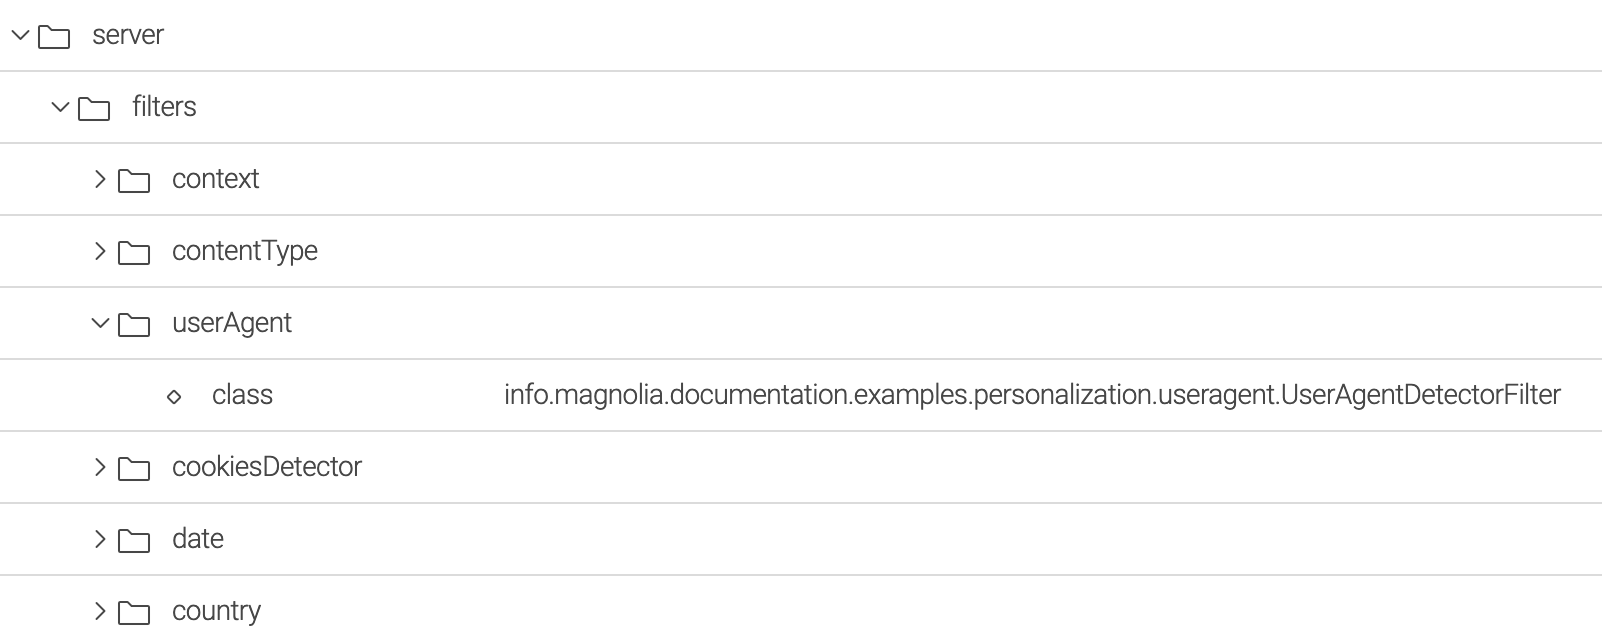
UserAgentDetectorFilter registration in the
filter
chain.
| Property | Description |
|---|---|
|
required Filters node |
|
required Filter name. Name the filter after your trait. Ideally, name the node to
match the trait registration node. In our
example the filter name is |
|
required Class that implements |
Position of the filter in the chain
Make sure the filter is in the right position in the chain. Filters are
executed in the order they are registered in the chain, from top to
bottom. You want to position the filter right after the contentType
filter.
When installing a module, you can define the position with
ModuleVersionHandler#getExtraInstallTasks.
info.magnolia.documentation.examples.personalization.setup.PersonalizationExamplesModuleVersionHandler
public class PersonalizationExamplesModuleVersionHandler extends DefaultModuleVersionHandler {
    @Override
    protected List<Task> getExtraInstallTasks(InstallContext installContext) {
        List<Task> tasks = new ArrayList<Task>();
        tasks.add(new FilterOrderingTask("userAgent", new String[]{"contentType"}));
        return tasks;
    }
}
Creating component variants
Now you can create component variants and choose an audience using the new trait.
The documentation-trait-tutorial module installs an example page named
maps-download that contains two custom variants of the Text and image
component.
| It is not possible to specify an audience for the original. The original acts as fallback (default) content when no variants match the visitor. |
Testing the result
You can test the personalized variants using a browser plugin or on different computers running Windows and OS-X. User agent switcher add-ons that allow you to spoof and mimic various user agents are available for Chrome/Chromium, Firefox and many other browsers.
You should now be able to see different renderings of the page containing the personalized variants of the Text and image component depending on the user agent.
Windows user agent
OS-X user agent
Other user agents