How to create a webhook
This page describes how you can create webhooks in Magnolia. The webhooks feature is provided by the Webhooks module. See that page for information how to install the module to your webapp.
The essentials of a webhook
Usually, the main purpose of a webhook is to communicate to an external API that an event has just occurred on the origin. The API then executes a further action accordingly.
At least the following must be configured for a webhook:
-
A webhook REST client, which will communicate with the external API.
-
A webhook event.
Internal or external REST client
In this guide, we configure a new REST client directly in the webhook configuration file but it is also possible to reference an already-existing REST client configuration through the restClientName and restCallName properties.
Location of a webhook configuration
All webhook definition Yaml files must be placed in the webhooks directory of your light module.
An API endpoint
For testing purposes, you may try several publicly available webhook APIs, for example:
|
As many of these public APIs are provided free-of-charge for testing, some limits may apply as to how many requests you can send per day, for example. Always get familiar with the sites' usage policies before testing. In the example configuration below, we use the last one: The address generated will be the value of the |
Example configuration
name: webhook1 (1)
url: https://httpdump.io/yxlbo (1)
method: get (1)
enabled: true (1)

events: (2)
  - name: goLive (3)
    eventType: Published
  - name: outdated (4)
    eventType: Unpublished
filter: "@path LIKE '%out-of-date%'"| 1 | The first half of this configuration defines the webhook name (webhook1) and the REST client properties. |
| 2 | The second half specifies the webhook events. Two webhook events are configured there: |
| 3 | goLive - to call the API whenever you publish a page. |
| 4 | outdated - to call the API whenever you unpublish a page, with a filter restriction applying though. |
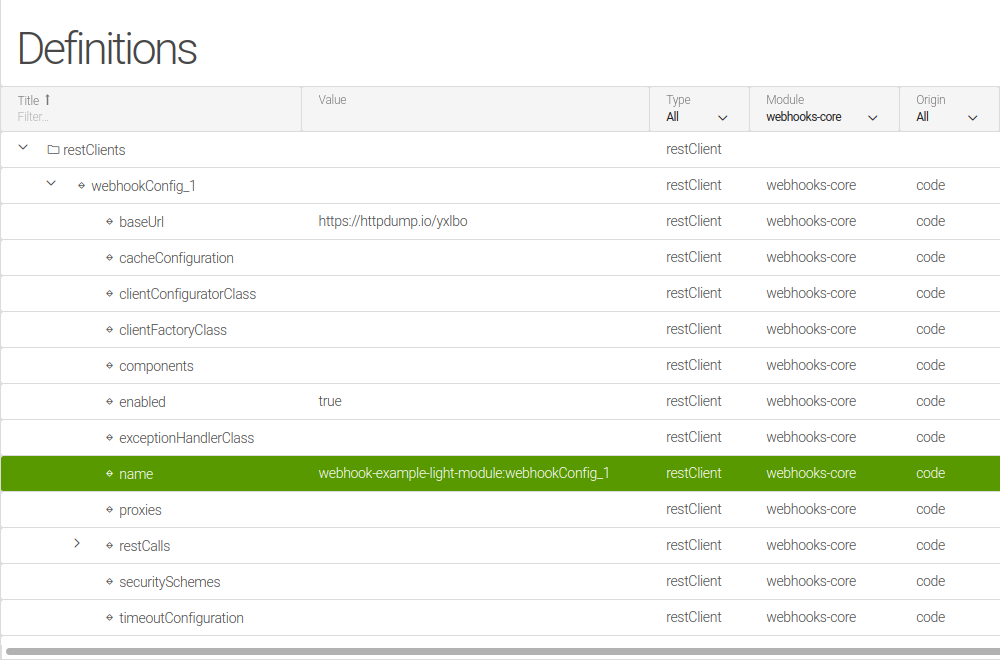
| When you add this configuration to your light module, Magnolia will create the associated REST client automatically. You can check the full client configuration in the Definitions app. |

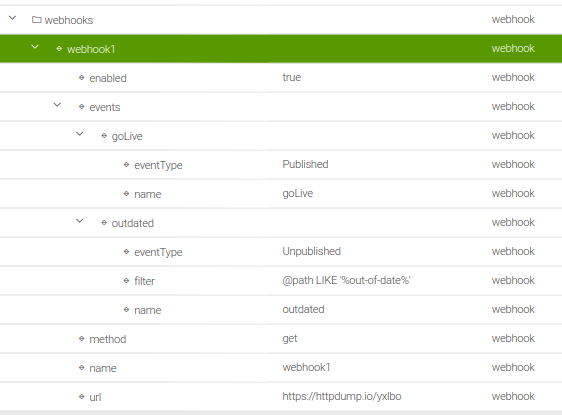
| The webhook configuration can also be reviewed in the app: |

Triggering the webhooks
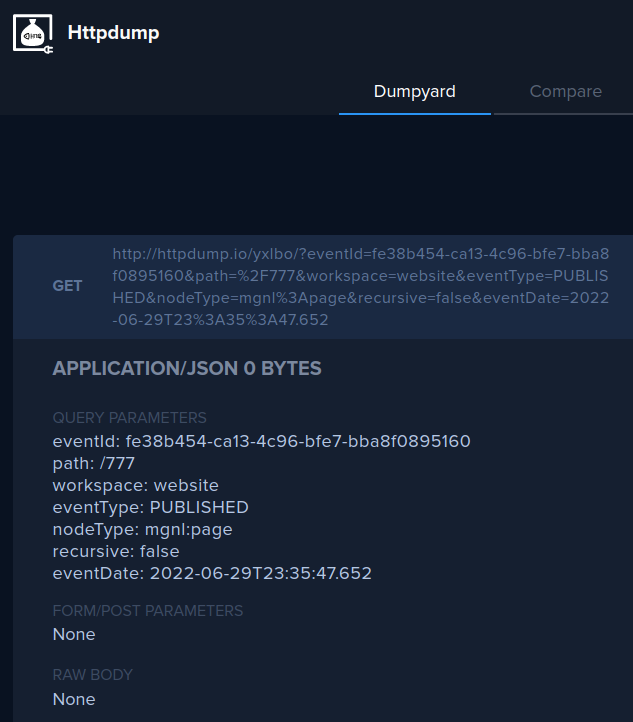
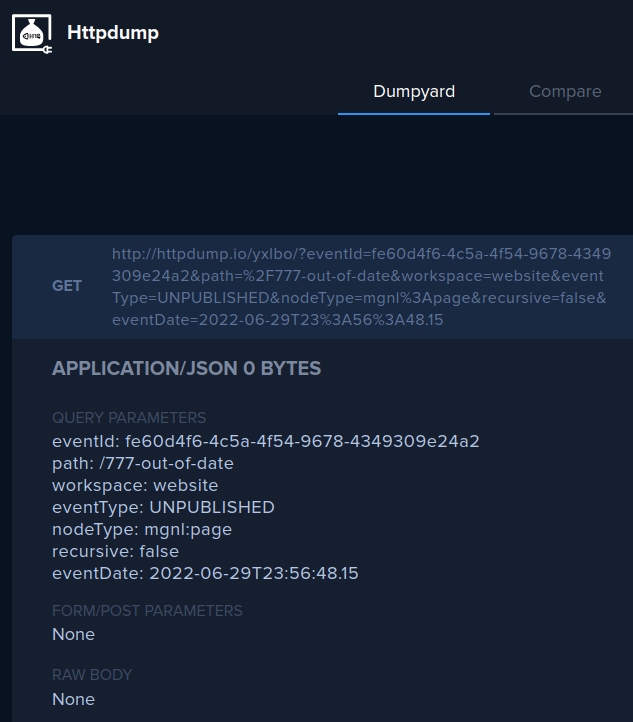
There are parameters which are appended automatically. You can see them also in the example screenshots below, for example eventId or eventDate.
|
Webhook event interception in command chains
Webhook commands are automatically added into any command chain containing the publish (activation) or unpublish command. By default, this is done for the Publishing and Personalization modules.
Publishing module
📁 publishing-core |
|
📁 config |
|
📁 commands |
|
📁 default |
|
⸬ activate |
|
⸬ deactivate |
|
⸬ publish |
|
⸬ publish |
|
⸬ webhook |
|
⬩ class |
info.magnolia.webhooks.command.ContentPublishedCommand |
⸬ unpublish |
|
⸬ unpublish |
|
⸬ webhook |
|
⬩ class |
info.magnolia.webhooks.command.ContentUnpublishedCommand |
Personalization module
📁 personalization-core |
|
📁 commands |
|
📁 default |
|
⸬ variant |
|
⸬ deleteVariant |
|
⸬ personalizationActivation |
|
⸬ personalizationActivation |
|
⸬ webhook |
|
⬩ class |
info.magnolia.webhooks.command.ContentPublishedCommand |
Publishing a page
The goLive event will be executed for any page you publish on the author instance. If you create and publish a page called 777, the API’s web interface will display something like the following:

Unpublishing a page
The outdated event is triggered when you unpublish a page. However, due to a filter definition configured for this event, only the pages that contain out-of-date in the title will be considered.
Hence, if you now rename the published 777 page to for example 777-out-of-date and unpublish it on the author instance, the webhook gets triggered and the API notified:

Webhook event and REST client configuration properties
The webhook properties allow you to configure even more complex webhook events than the ones showcased above.
See also the possibilities of Magnolia REST client configuration properties, including definition of security schemes, timeouts, or caching for more advanced REST API communication scenarios.
|
By allowing REST client configuration properties in a webhook configuration file we are not porting REST client configurations to webhook Yaml files. For complex REST client configurations, always try to configure them in the native /restClients/ folder of your module and only reference a configuration in a webhook definition. |