Configure the DAM connector
This sections details how to use the module.
Prerequisites
You must have a Cloudinary account.
Configuration
Once the Cloudinary app module is installed there is some import basic configuration. We need to configure credentials for magnolia-dam-cloudinary-app.
| Parameter | Description |
|---|---|
|
optional
|
|
mandatory Credentials to connect to Cloudinary, they can be defined in the configuration or in the Passwords app. |
|
mandatory Credentials to connect to Cloudinary, they can be defined in the configuration or in the Passwords app. |
|
mandatory Credentials to connect to Cloudinary, they can be defined in the configuration or in the Passwords app. |
Credentials
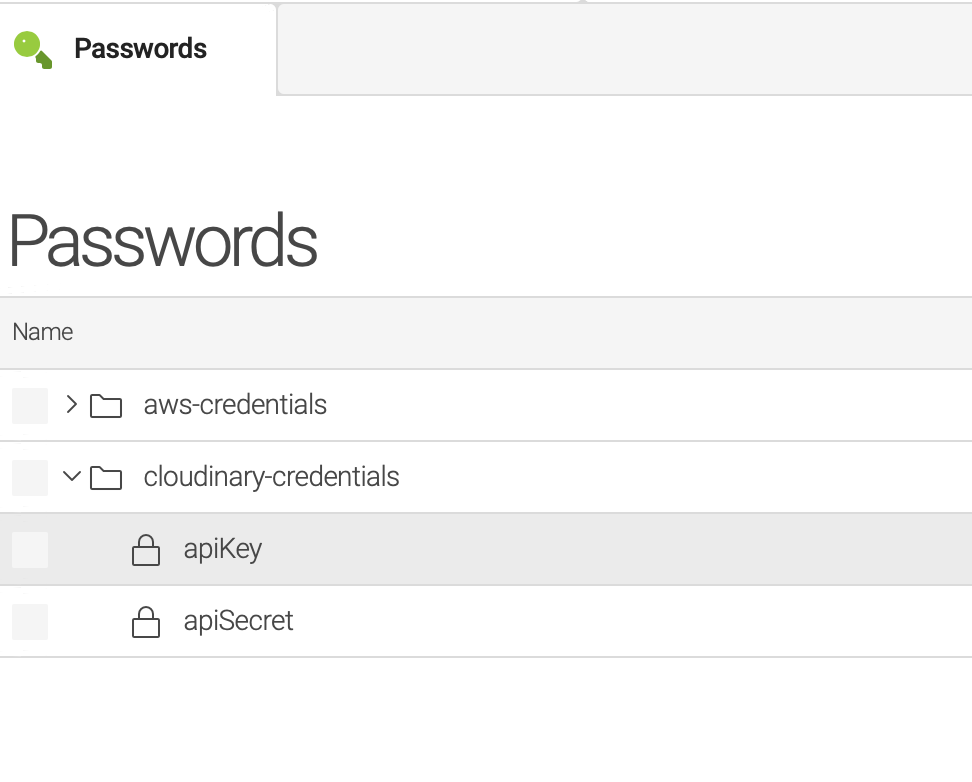
Credentials can be stored on the Passwords app see the screenshot below. You can override them in the config.yaml file as so.
| By default editors will have access to Cloudinary images allow to this account, they will be able to create/edit/delete, add roles to prevent those actions if needed or restrict the actions by user groups/roles. |
apiKey: /cloudinary-credentials/apiKey
apiSecret: /cloudinary-credentials/apiSecret
cloudName: cloudName
Provider
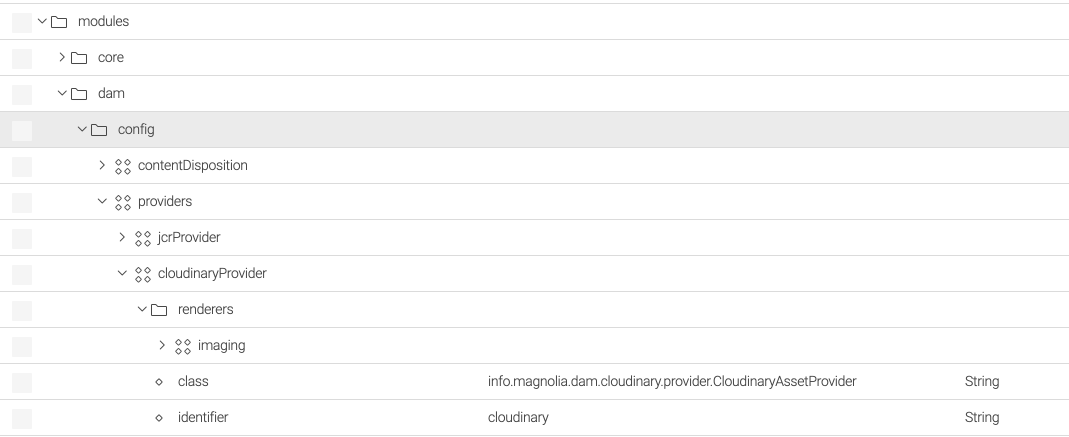
Cloudinary provider is installed automatically from the first time it’s installed. If you don’t see this, it may not be installed properly, or it may be deleted by accidentally, you can recreate it similar to this structure.

Renderer
This implementation provides its own renderer:
info.magnolia.external.dam.cloudinary.renderer.CloudinaryAssetRendererThis renderer will get the renditions from Cloudinary directly, if the rendition is just a number, it will append 'w_' by default for compatibility with the demo project, other renditions can be get like this:
damfn.getRendition(asset, "w_400,h_400,c_crop,g_face,r_max/w_200")Endpoint
From version 1.1.2/*, there is configuration that adds an endpoint and a rest role added to the anonymous user for Cloudinary access.
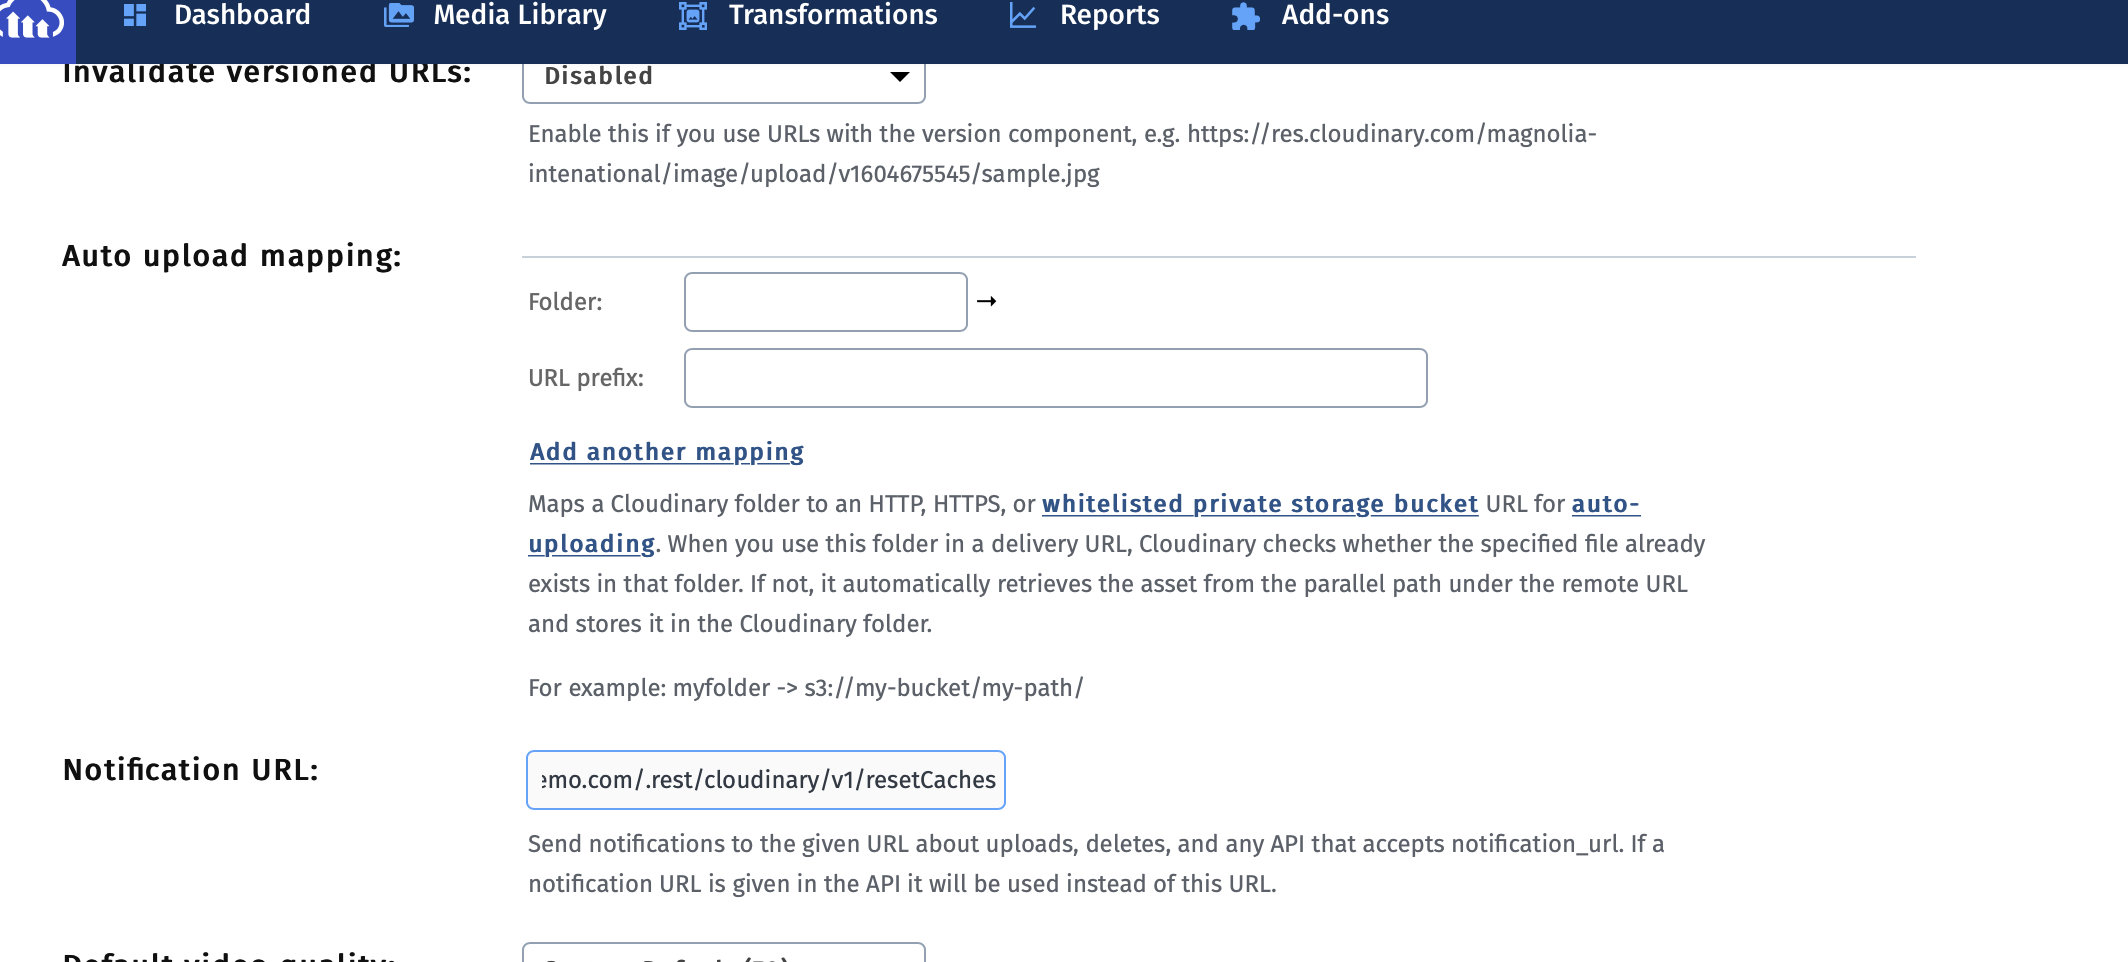
The endpoint receives Cloudinary notifications to refresh the cache when working directly with Cloudinary server.
To configure the notification_url:
-
Log into your Cloudinary Management Console.
-
Set the
notification_urlto the domain name and the endpoint path.http://YOUR_DOMAIN.com/.rest/cloudinary/v1/resetCaches (1)1 Replace YOUR_DOMAINwith your actual domain.

From version 1.1.13/*
There is configuration that adds an endpoint to cache Cloudinary assets based on Cloudinary webhook notifications. The endpoint receives Cloudinary notifications to generate and/or update cached assets and reduce Cloudinary API calls.
To configure the notification_url:
-
Log into the Cloudinary Management Console.
-
Find Webhook Notifications and look for the
notification_urlsetting. -
Set the
notification_urlto the domain name and the endpoint path.http://YOUR_DOMAIN.com/.rest/cloudinary/v1/notifications (1)1 Replace YOUR_DOMAINwith your actual domain.
You can create a Warm-up Cache for Cloudinary using the rest endpoints.
The cached assets are stored in the cloudinary-media workspace.
The three endpoints create, publish, and delete the JCR cache.
Make a GET call to the endpoints to trigger the cache operations.
http://YOUR_DOMAIN.com/.rest/cloudinary/v1/warmupJcrCache/load (1)
http://YOUR_DOMAIN.com/.rest/cloudinary/v1/warmupJcrCache/publish (1)
http://YOUR_DOMAIN.com/.rest/cloudinary/v1/deleteJcrCache (1)| 1 | Replace YOUR_DOMAIN with your actual domain. |


